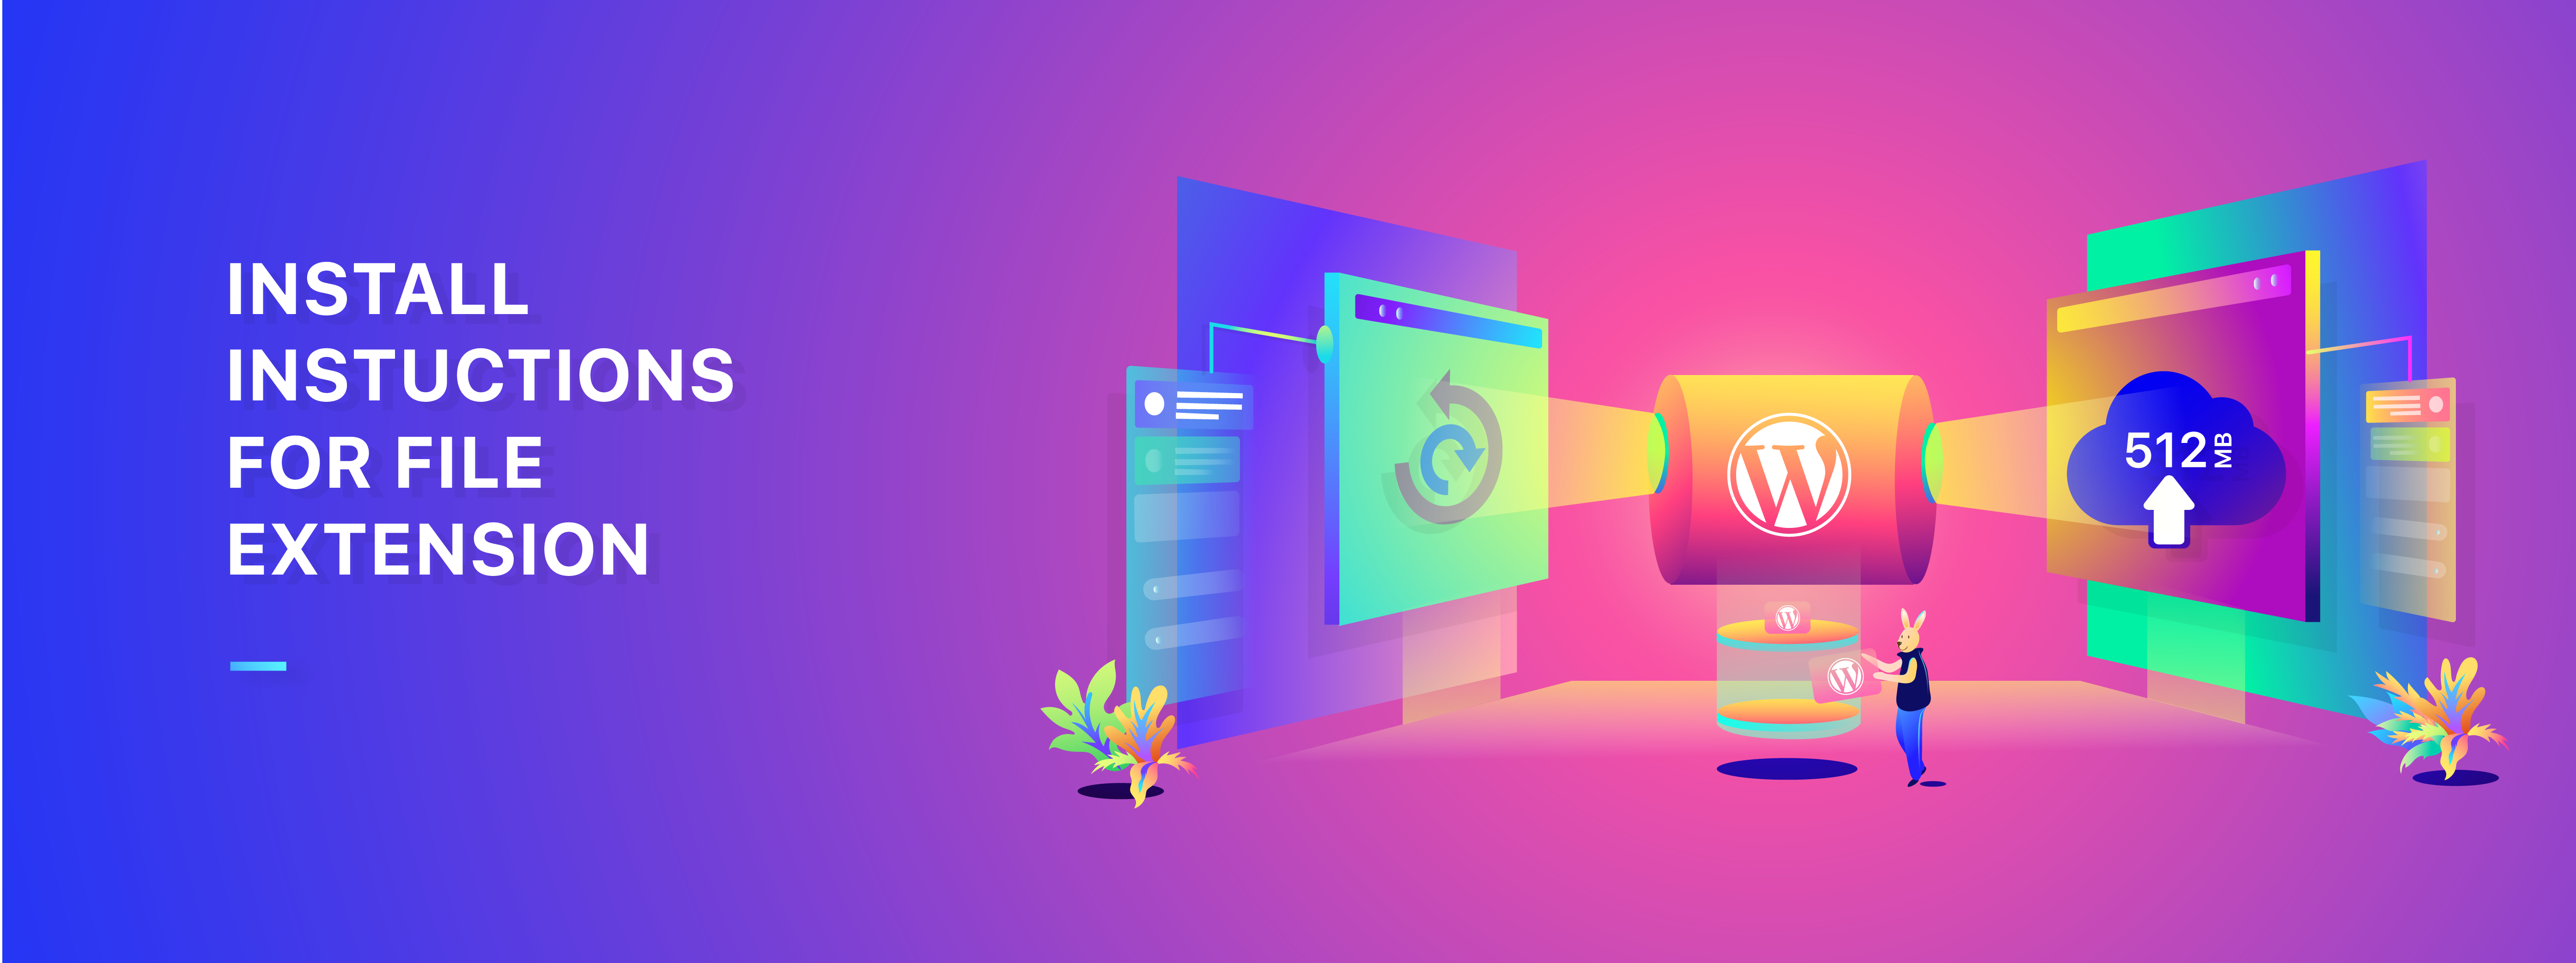
카페 24 호스팅으로 워드프레스를 통채로 옮기기
옮기려고 하는 워드프레스와 옮기고자 하는 워드프레스에
all in one wp migration 플러그인을 설치한다음
export 를 이용해서 파일을 컴퓨터에 저장하고,
import 를 이용해서 다운 받은 파일을 업로드 합니다.
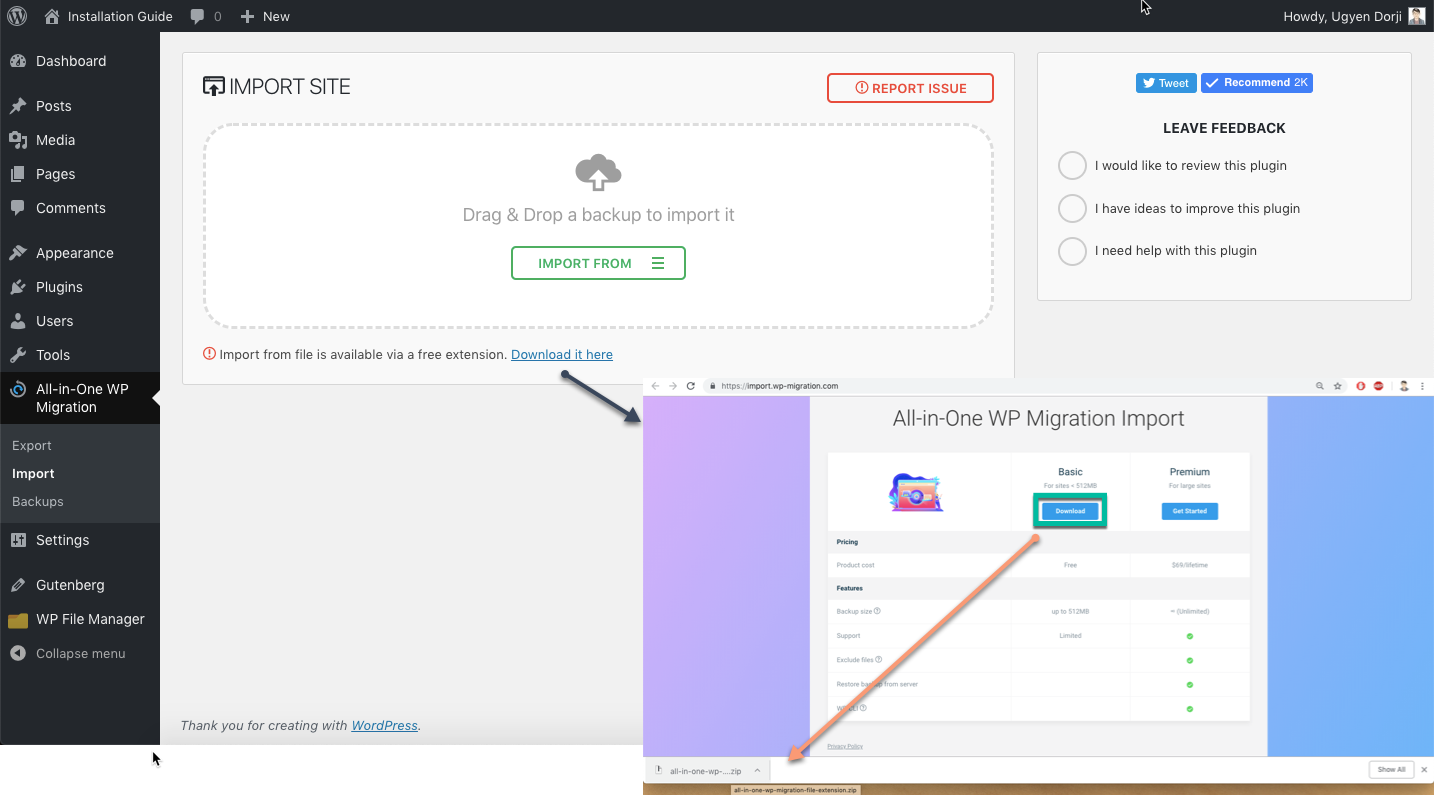
import 시 카페 24 호스팅에서는
파일 업로드 용량 제한이 있어서, 용량 제한을 풀어주어야 합니다.
업로드하려는 파일이 512 메가 이하일 경우에는
추가로 all in one wp migration 사이트에서 파일을 다운로드한 다음
설치를 해주면,
파일 업로드가 가능하게 됩니다.
아래의 사진은 전체적인 과정을 설명한 것이고,
중간에는 업로드 파일 제한을 512 메가까지 올리는 방법을 알 수 있습니다.
There are 2 simple steps to install the File Extension
- Install and activate the All-in-One WP Migration Plugin from the Plugin section of the WordPress Console
- Upload and activate the extension that we sent you to the Plugin section of the WordPress Console
Step 1: Install the free All-in-One WP Migration Plugin
(You can skip to step 2 if you already have the plugin installed)
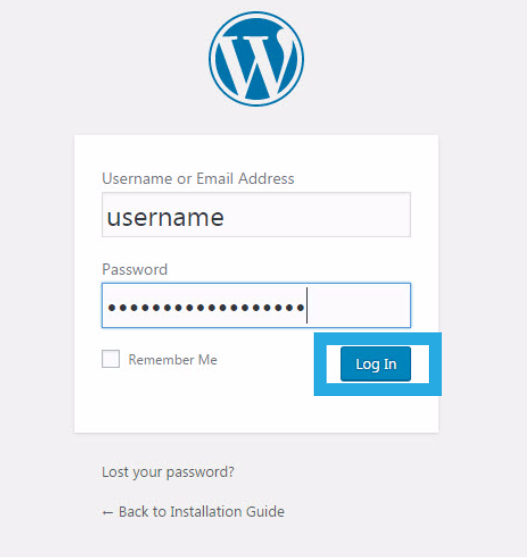
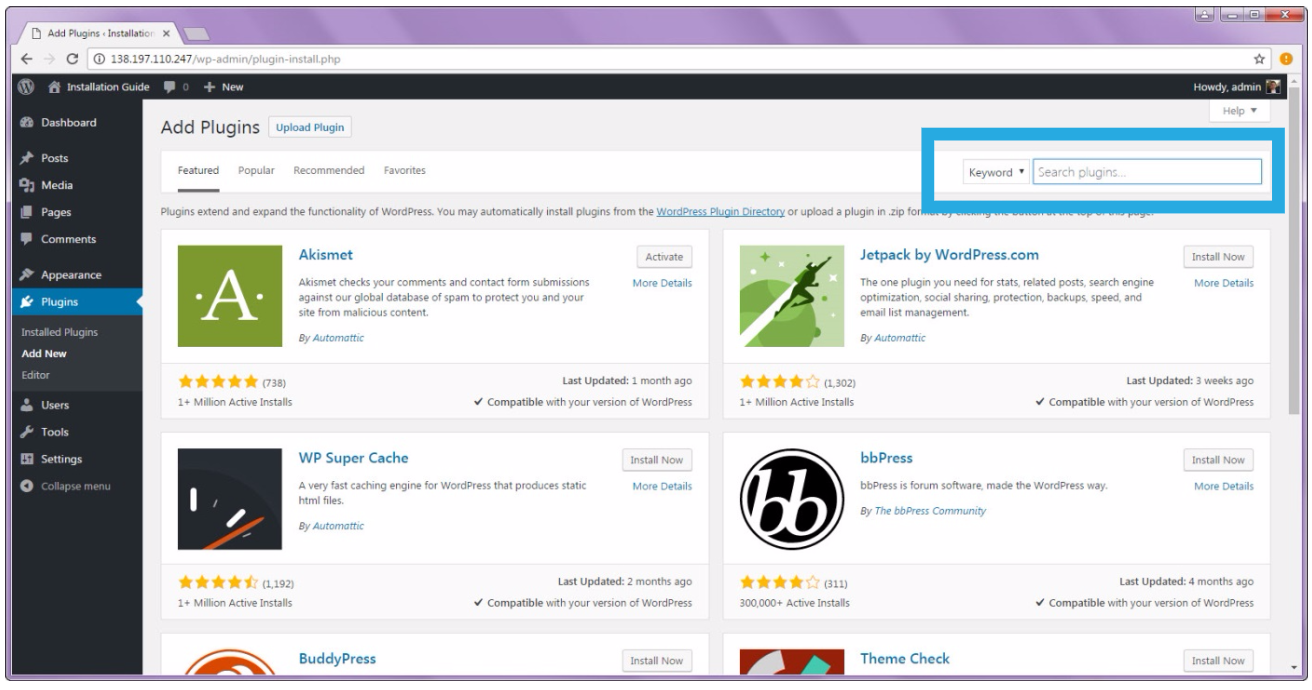
- In a Google Chrome web browser, open your WordPress website’s admin page. (yourerbsiteurl.com/wp-admin)
- Log in with your username and password .
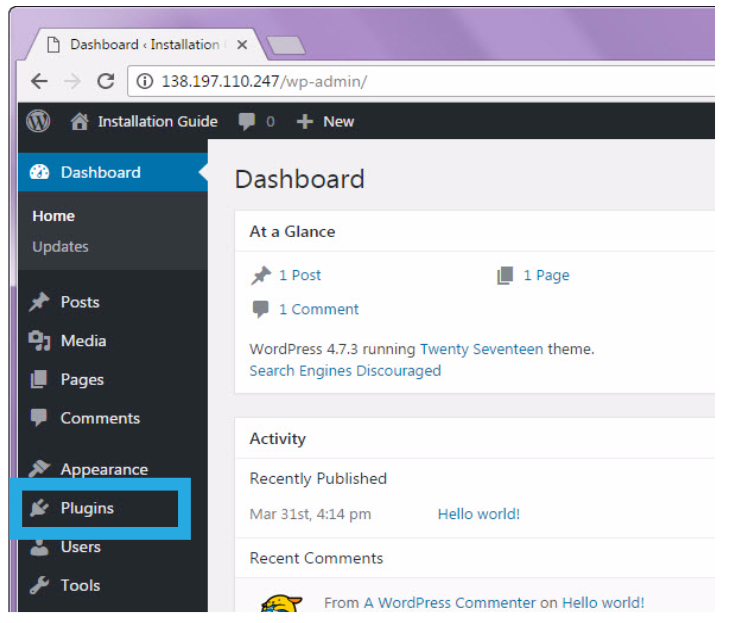
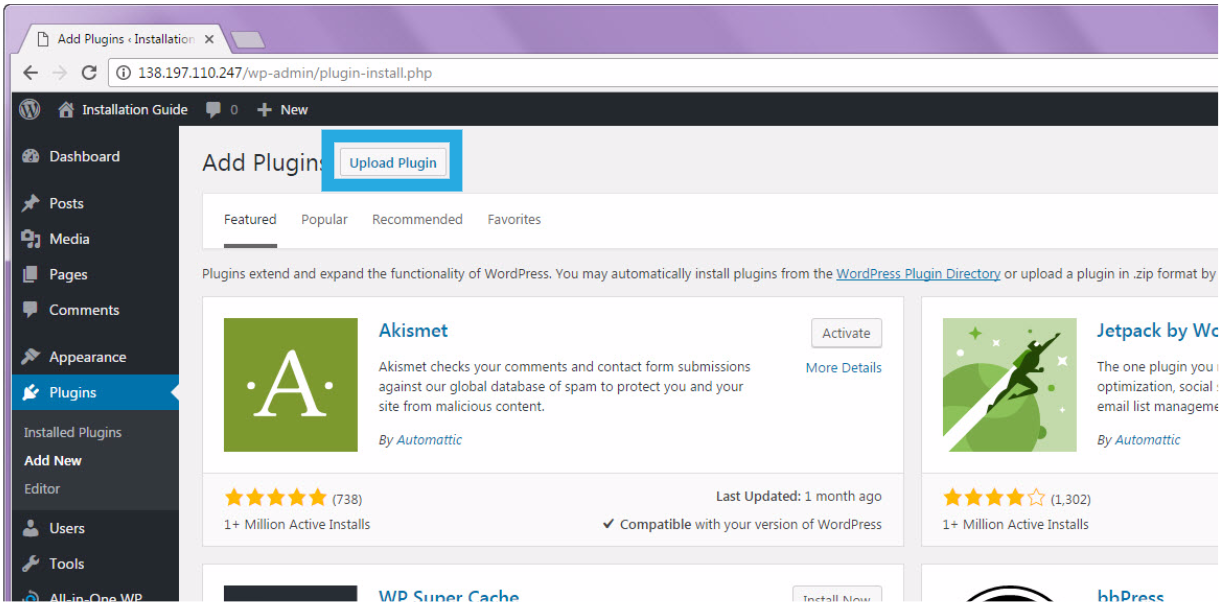
- Navigate to the “Plugins” sub menu.
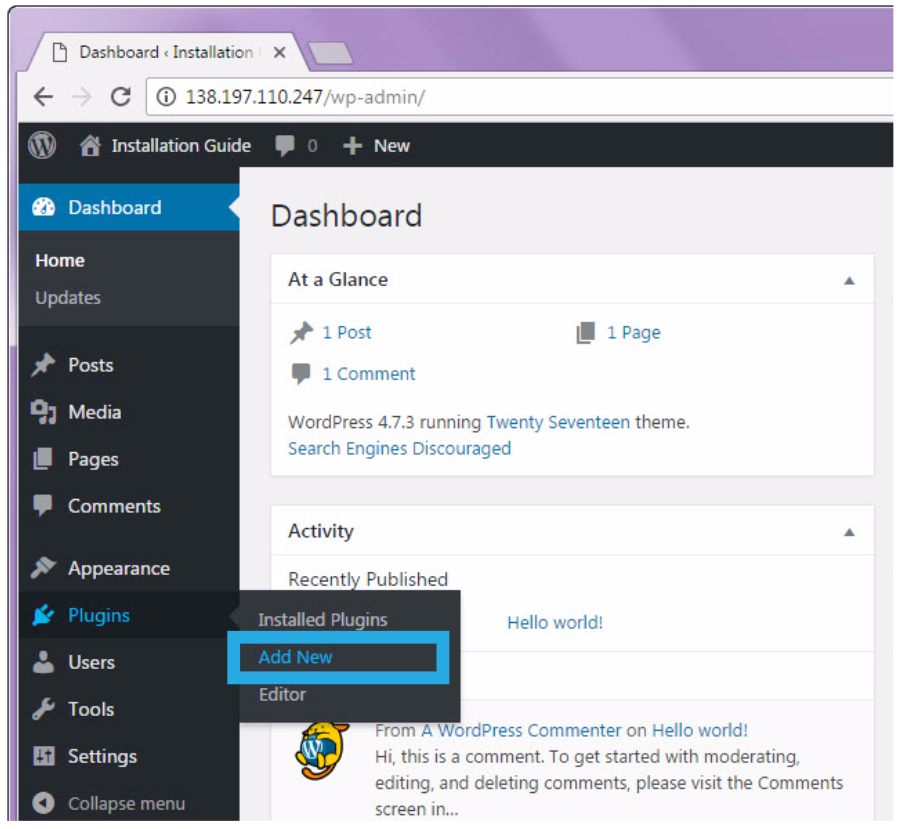
- On the “Plugins” sub menu, click on “Add New”.
- In the “Search plugins…” box, type in “All-in-One WP Migration” and press Enter on your keyboard.
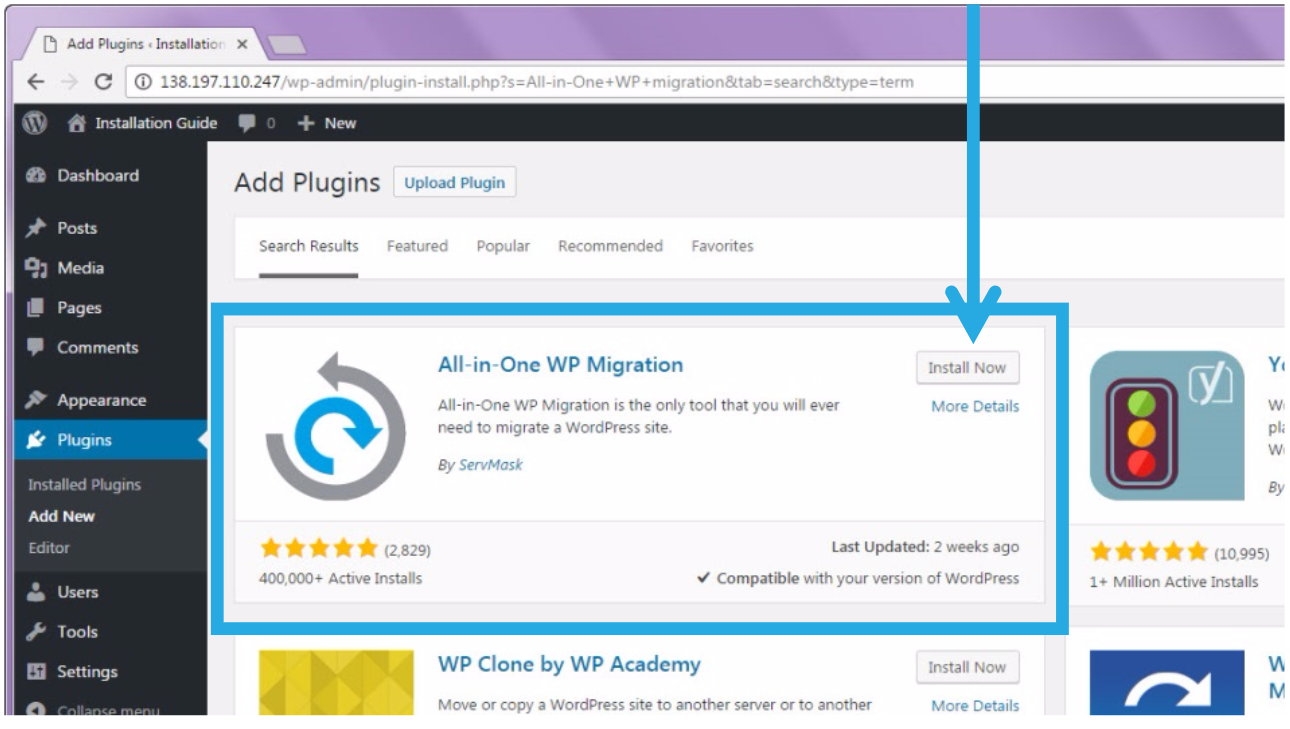
- Install the All-in-One WP Migration plugin by clicking on the “Install Now” button.
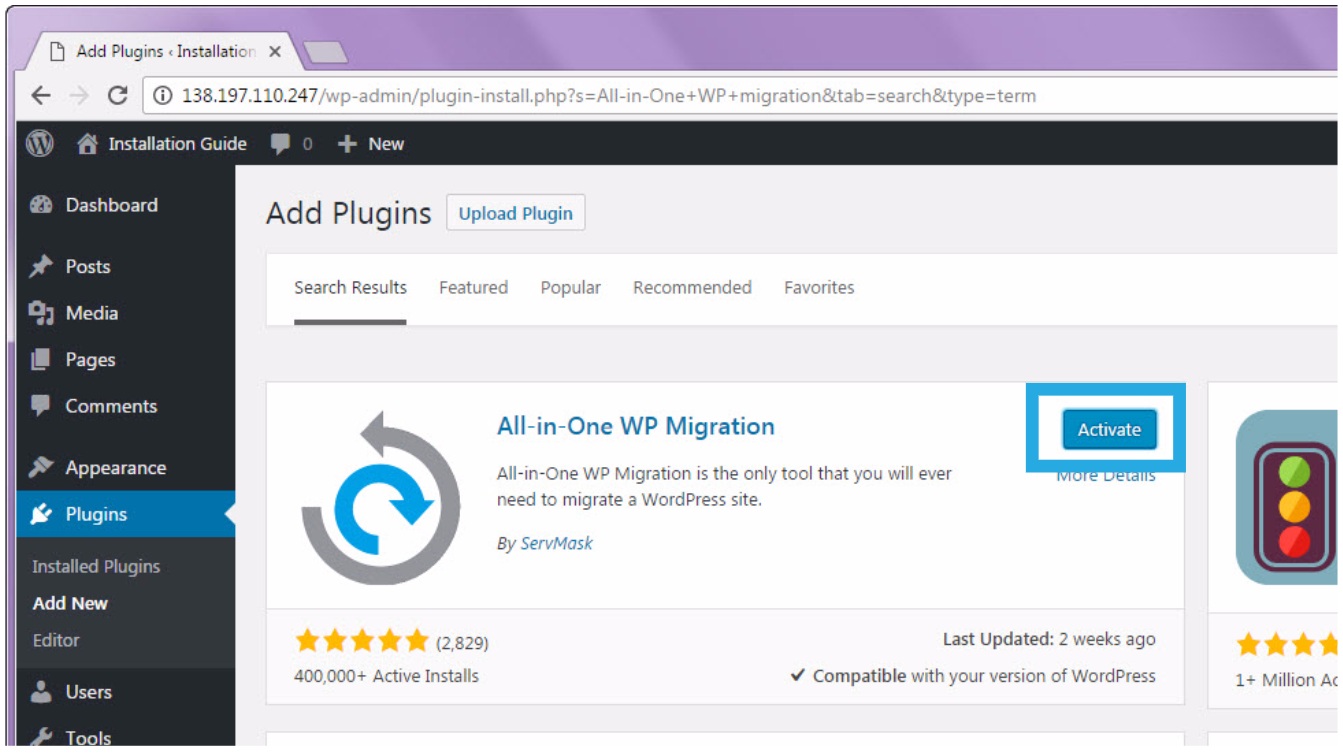
- The installation process is quick. Once it has changed, click on the “Activate” button.
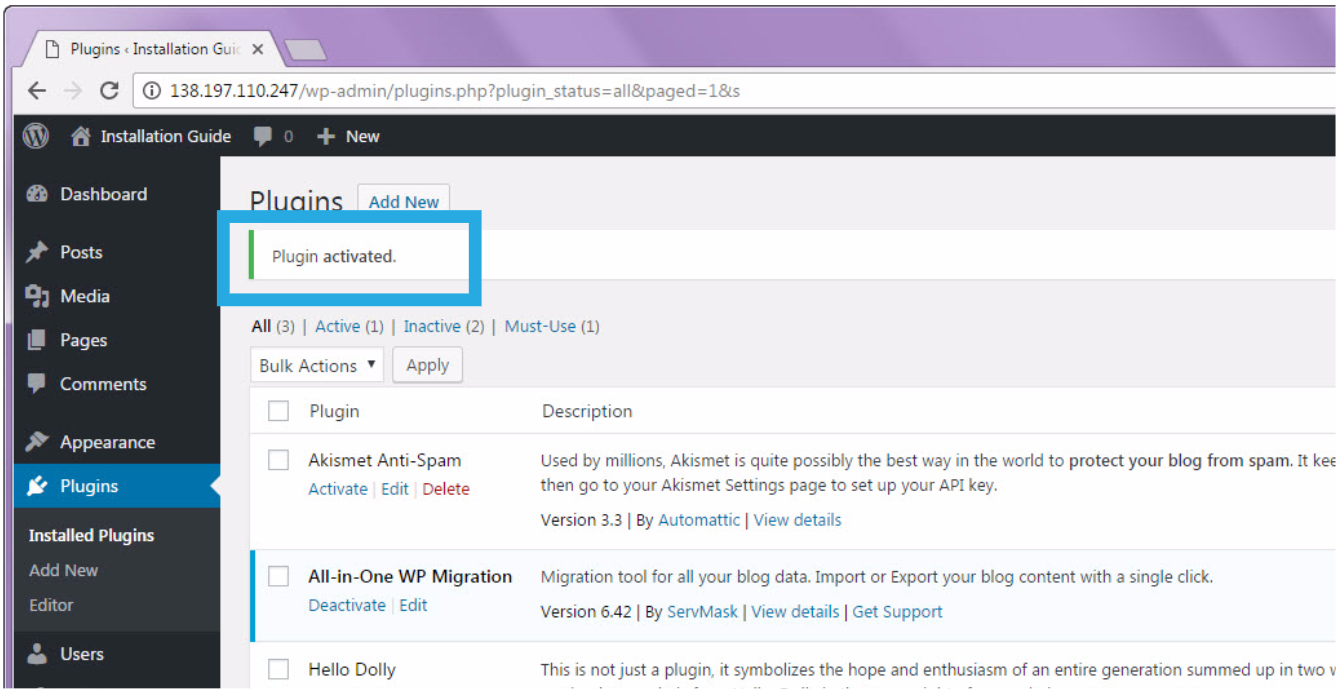
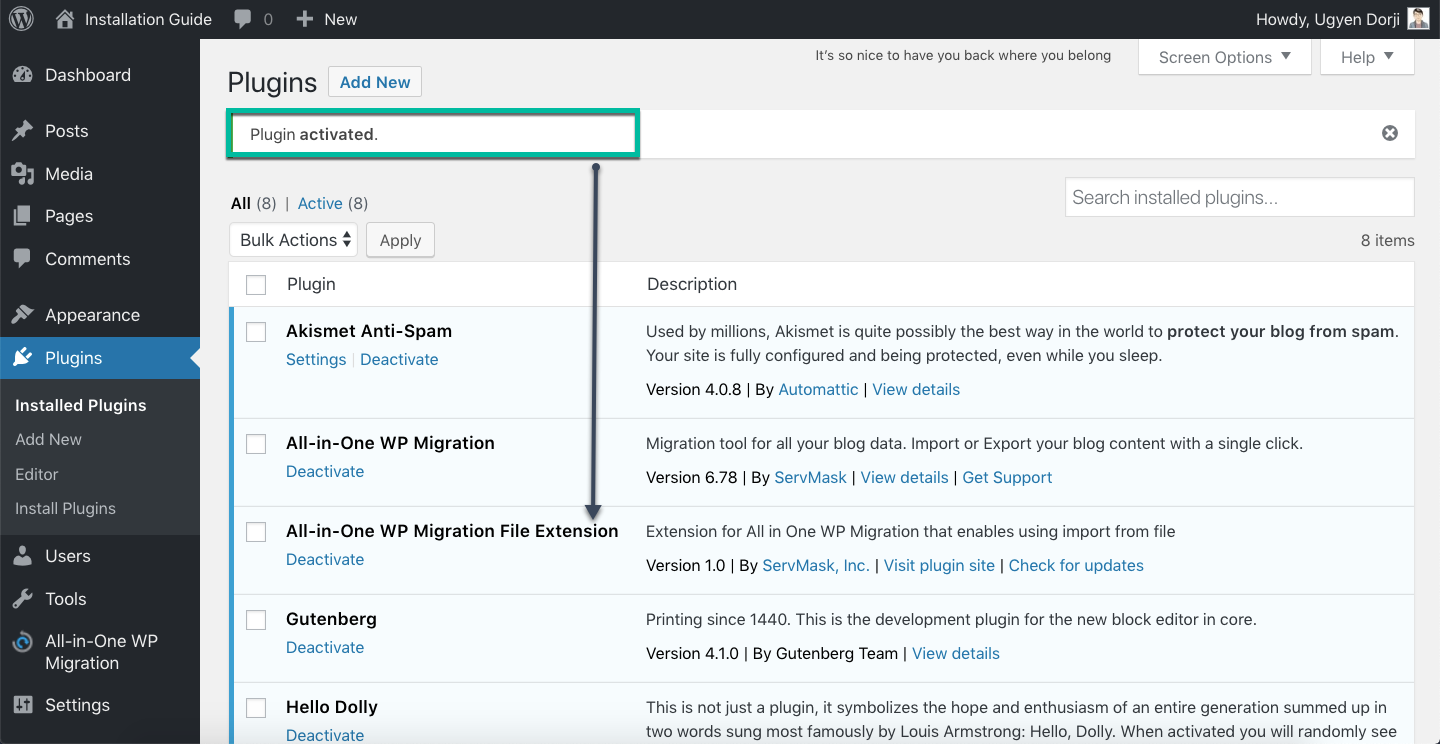
- You will get a notification that states, “Plugin activated”. You will see the new plugin in your list of plugins.
Step 2: Install the free All-in-One WP Migration File Extension
- Download our free All-in-one WP Migration File Extension from this link – https://import.wp-migration.com/.
- In a Google Chrome web browser, open your WordPress website’s admin page. (yourerbsiteurl.com/wp-admin)
- Navigate to the “Plugins” sub menu
- On the “Plugins” sub menu, click on “Add New.”
- Click on “Upload Plugin”.
- Click on “Choose File” to select the .zip file that you downloaded from the email.
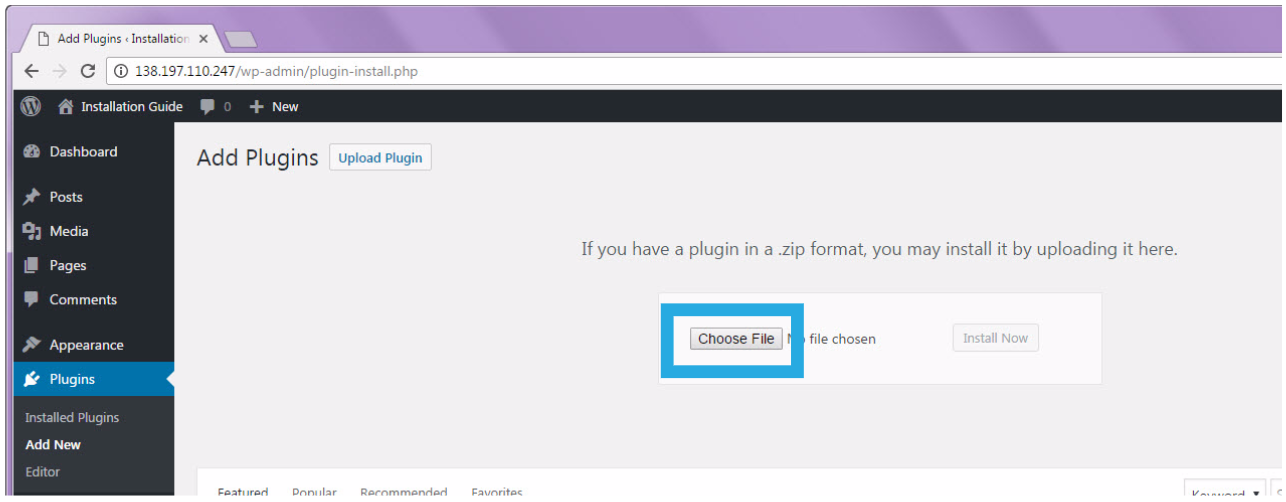
- Navigate to the folder location where you saved the extension. Select the “all-in-one-wp-migration-file-extension.zip” file and click “Open.”
- Once uploaded, click “Install Now”.

- Click on “Activate Plugin”.
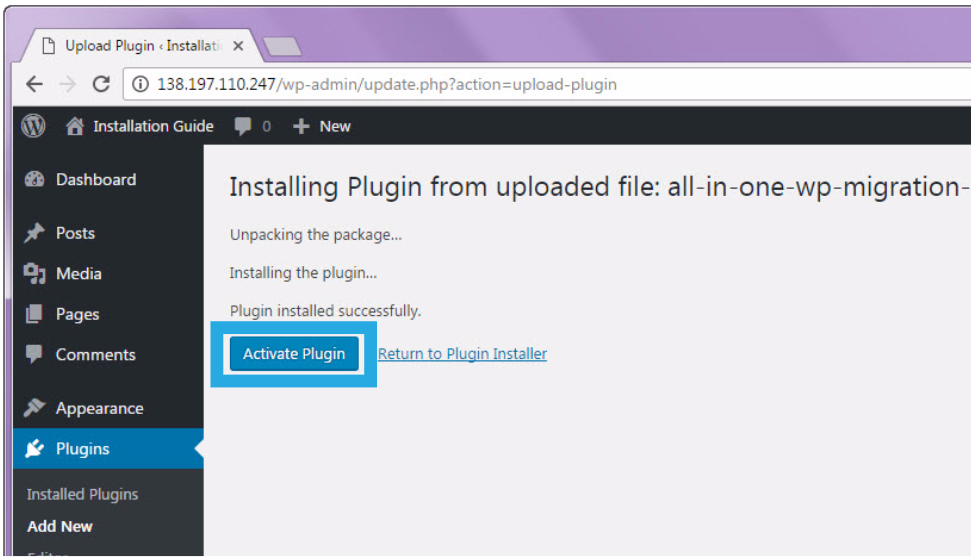
- You will get a notification that states, “Plugin activated”. You will see the new plugin in your list of plugins.
거친 말, 욕설, 모욕 등은 삭제 처리될 수 있습니다.
댓글로 인해 상처받는 분이 없도록 서로 예의를 지켜 주시기 바랍니다. ~ ♬


